 |
GloExplorer
|

With the GloExplorer persistent objects can be created, modified, saved, read and deleted.
The GloExplorer is a typical MDI application. The objects to be edited independently, e.g. AllSets and objects, are edited in separate document windows, only dependent objects, e.g. attributes, are edited in dialogs.
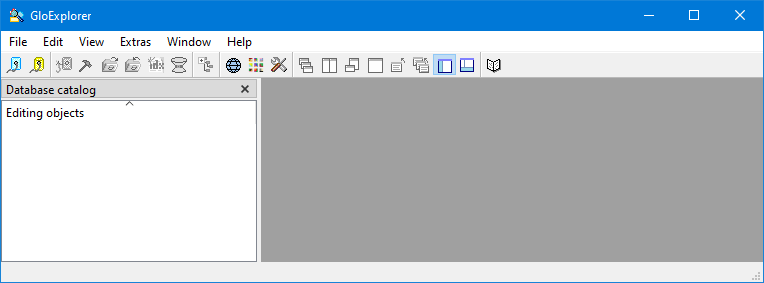
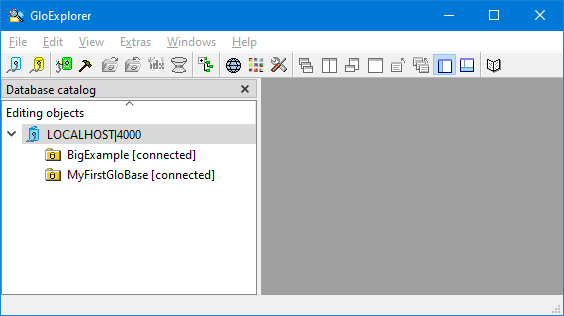
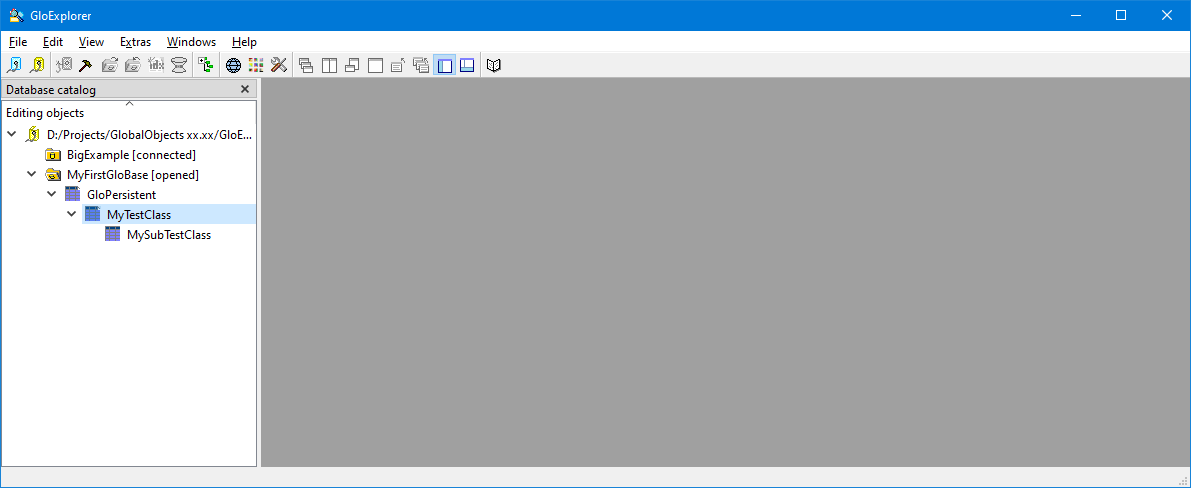
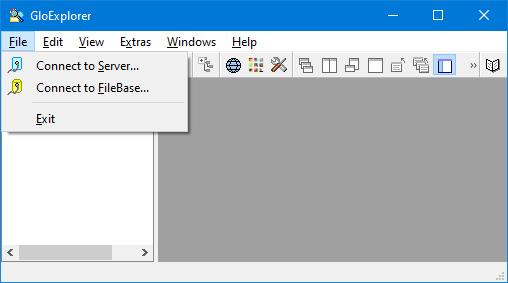
GloExplorer after the first start:
A GlobalObjects database is defined by a schema, is a simple text file. For example, if the schema file is stored in the database directory (e.g. "D:/Projects/GlobalObects xx.xx/GloExamples/Bases"), the tables are stored in a subdirectory there (e.g. "MyFirstGloBase"). The name of the database directory is defined in the schema file. The name of the schema is the name of the database.
It can connect to a database directory directly, in single user mode (no one else may access the objects) or via a GloServer in multi-user mode (others may also access the objects).
The GloExplorer can be connected to several database directories and GloServers simultaneously.
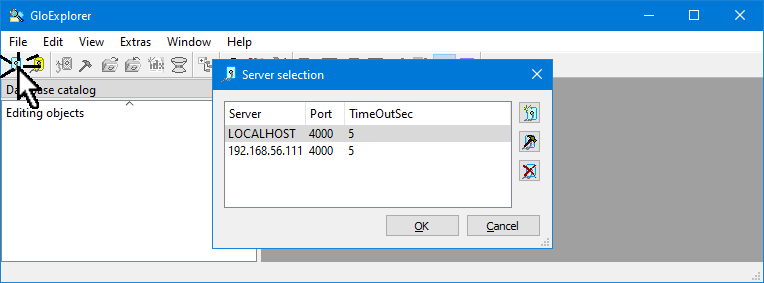
After the start the GloExplorer can be connected with a GloServer. It is possible to connect with several GloServers.
A server can be selected from the selection, or...
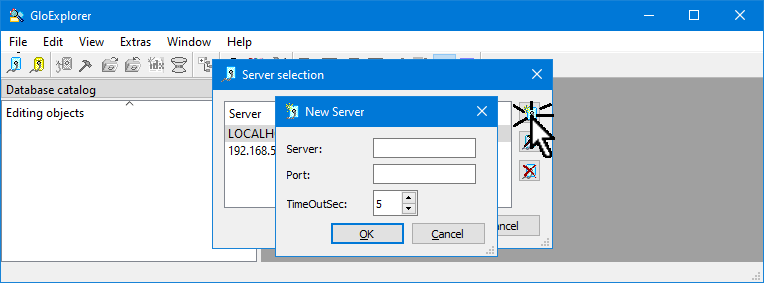
... a new server will be registered...
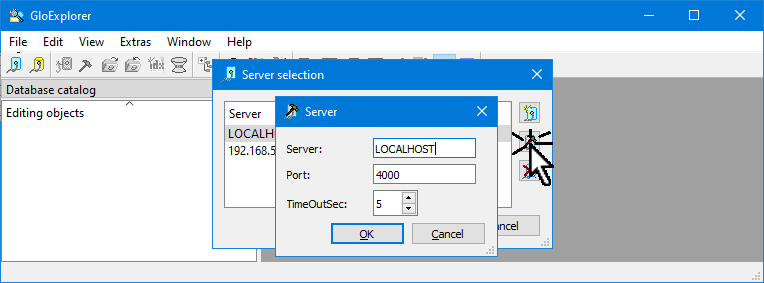
...or be changed.
When the displayed server is "expanded", the databases known to the server are displayed.
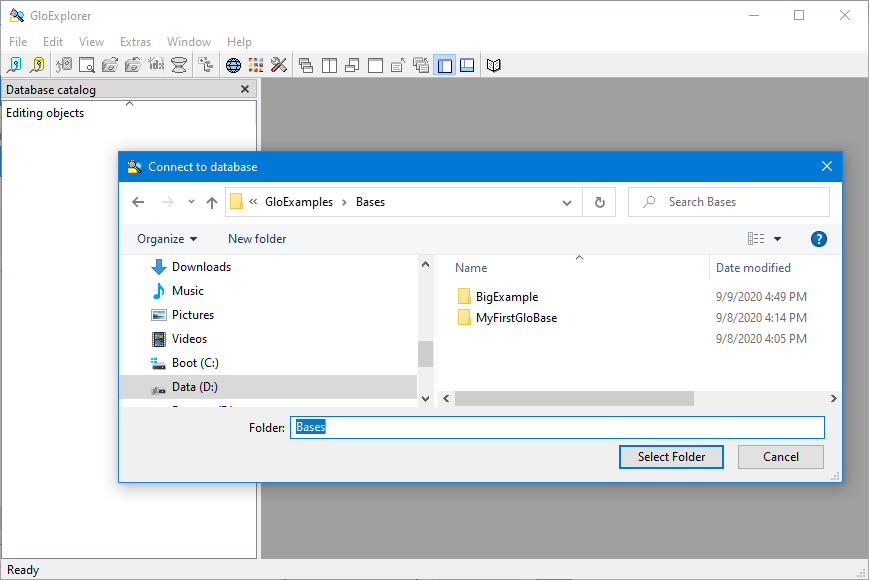
For exclusive access the GloExplorer can also be connected to a database directory. It is possible to connect to several database directories.
The database directory can be selected.
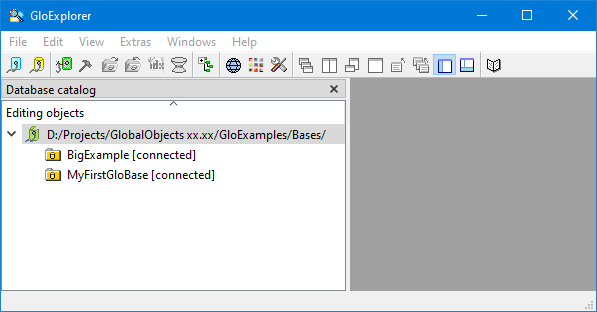
If the displayed database directory is "expanded", the schemas respectively databases located in this directory are displayed.
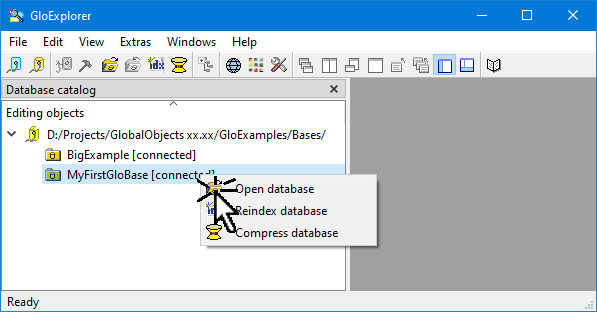
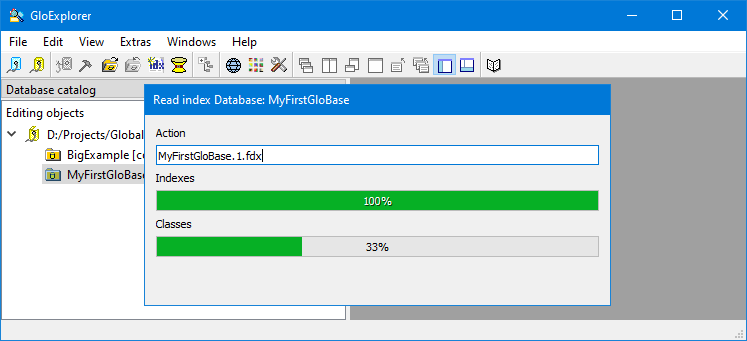
To access the objects in a GlobalObjects database, it must be opened.
The progress of reading the indexes is displayed.
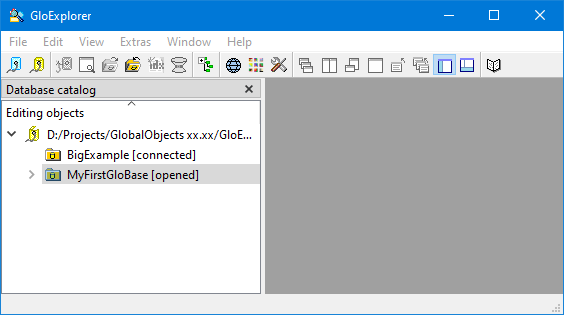
The database is open.
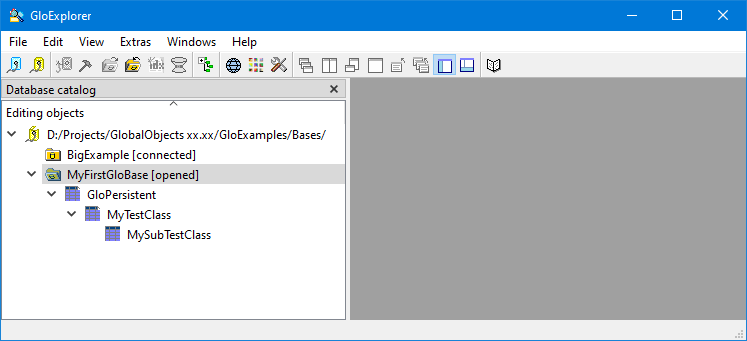
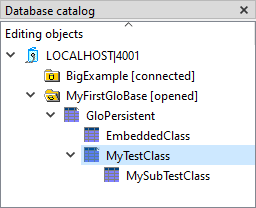
When the open database is "expanded", ...
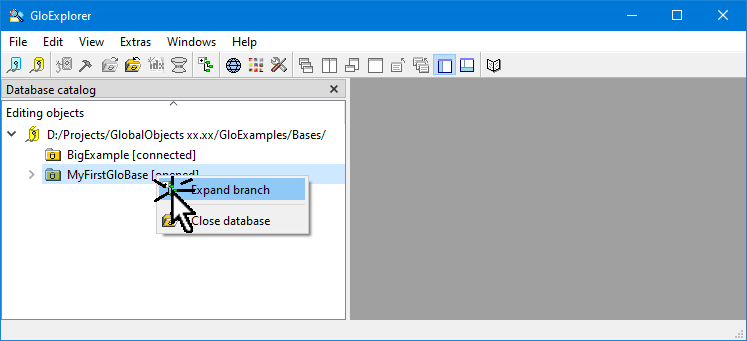
...the classes managed in it are displayed in their inheritance hierarchy.
If the opened database is "expanded" in the list view, ...

...the classes managed in it are displayed sorted alphabetically.

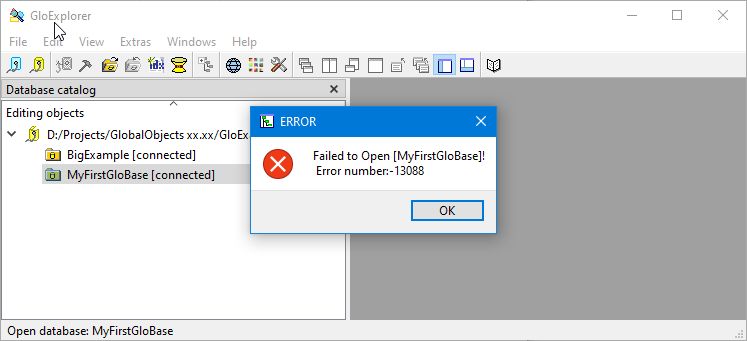
It is possible that indexes may be damaged or not exist at all. This prevents a database from being opened.
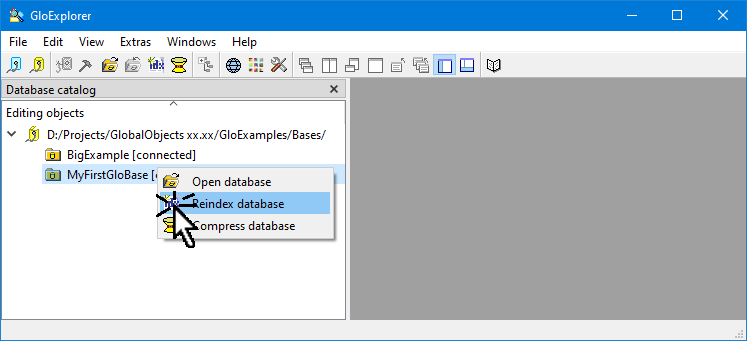
Then in most cases a re-indexing of the database,…
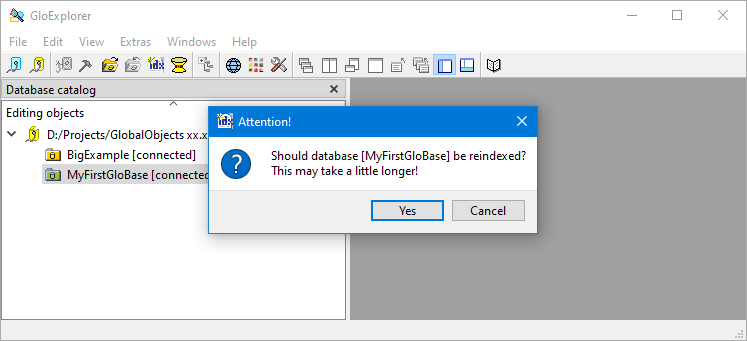
...which is carried out after a confirmation, helps.
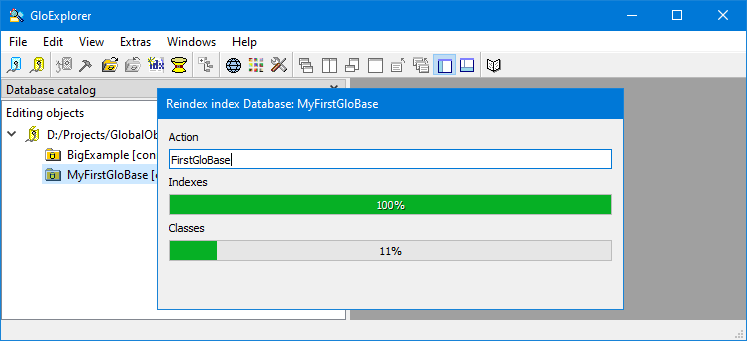
The progress of reindexing the indexes is displayed.
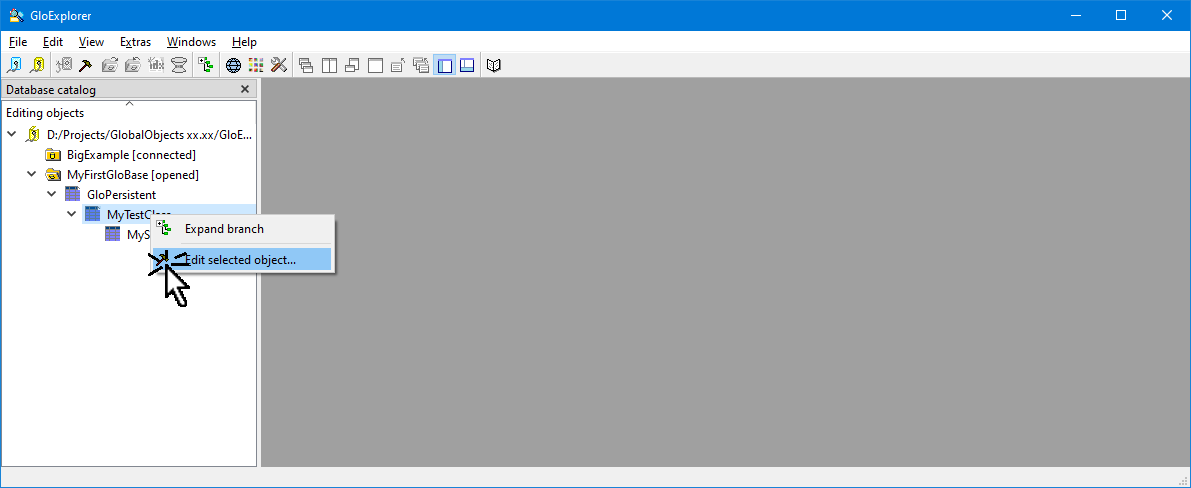
The AllSet of a class…
...can be opened.
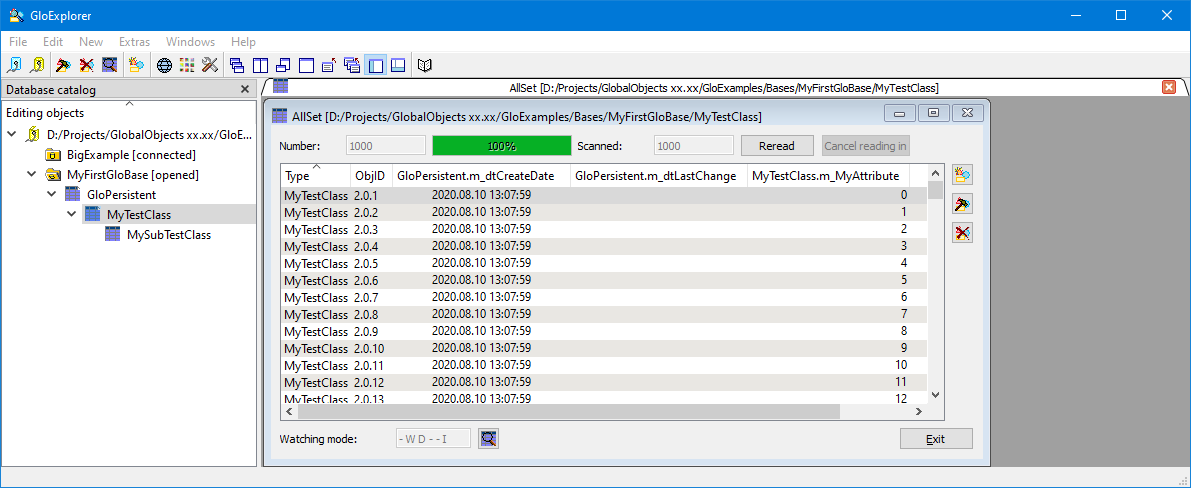
The objects or the entries from the table are read in.
To ensure that the display is updated when changes are made by other clients, an AllSet watching dialog can be used to set a watching mode.
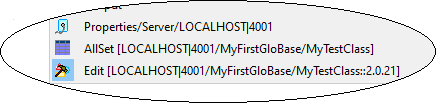
A new persistent object can be created or an existing object can be edited. A corresponding document window is opened in the work area for this purpose.
See also Edit persistent object.
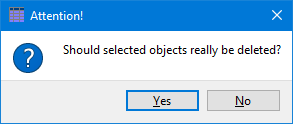
Selected persistent objects can be deleted from AllSet respectively from the database after a query.

If the default deletion depth is not set in the settings, it will be asked for.

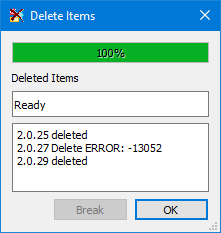
The deleted and, if necessary, because of a lock, not deleted objects are displayed.
GloExplorer has two "docked" windows, which can be hidden and the workspace in which the individual document windows are displayed.
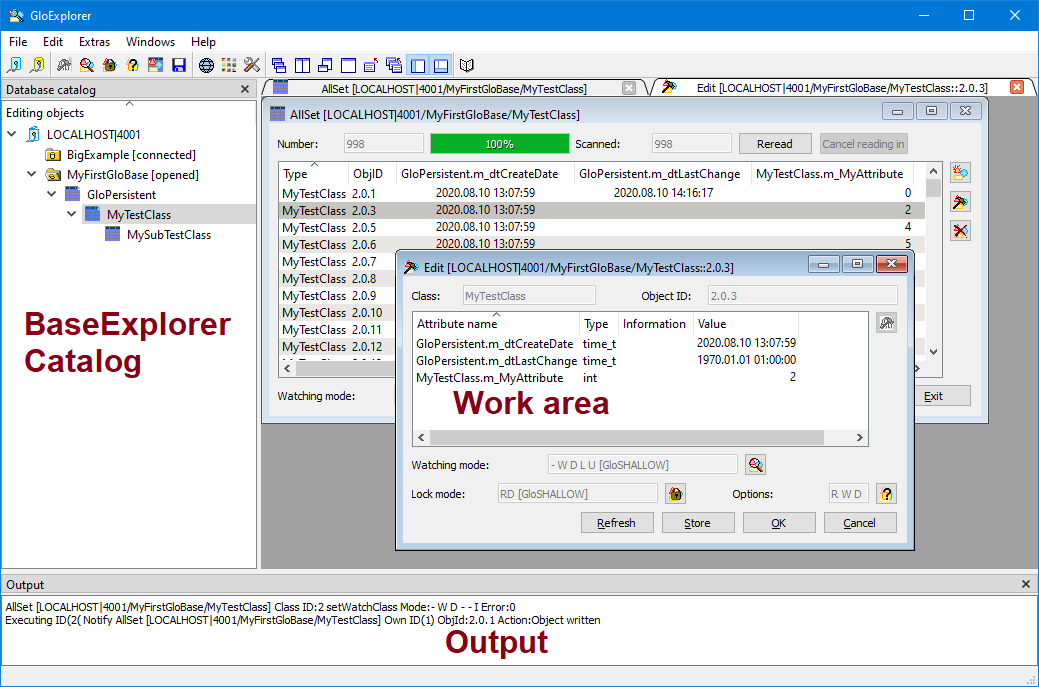
In the window docked on the left, the selected database directories and GloServer with their respective databases and classes are displayed in a tree structure or list view. (Not all) elements of the view can be manipulated or edited by double-clicking the left mouse button, the Enter key or by pressing the right mouse button in a document window.
Information is displayed in the window docked below.

The document windows to be edited are made available in the work area.

The individual menus and their entries are explained below. Some menu entries are only accessible if corresponding prerequisites are met. For example, a database can only be closed when it is open. Equivalently, there is a tool button for each menu item in the toolbar. When the mouse pointer is moved over the buttons, the menu item text is displayed.
Depending on the object currently being edited, the menus and their entries change in context.
Last but not least you have the possibility to call up a context menu in each object to be edited by pressing the right mouse button.
The file menu allows to connect the GloExplorer with database directories and GloServer with their databases or to close the GloExplorer.

A dialogue will open...
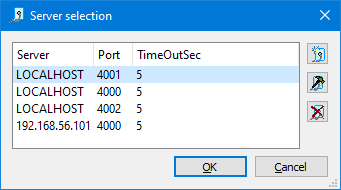
...to connect to a GloServer.

A dialogue will open...
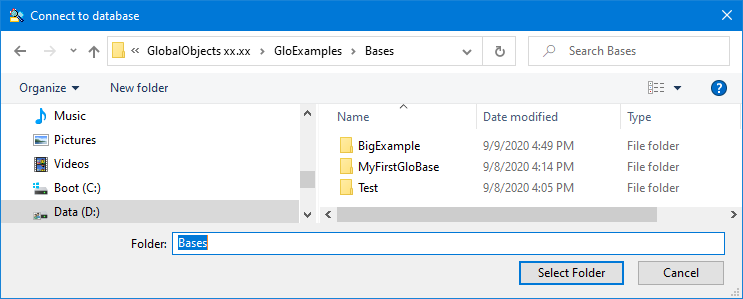
...to connect to a database directory.

The GloExplorer can be closed with the menu item File / Exit. The user is offered to save any modified objects before closing.
If the Explorer Catalog has the focus, the following entries are available in the Edit menu, depending on the selected entry:


If a GloServer or a FileBase is selected, it is terminated. The user is offered to save any changed objects before the connection is terminated.

When a GloServer is selected in the Explorer Catalog, further information can be displayed in a GloServer Document Window.
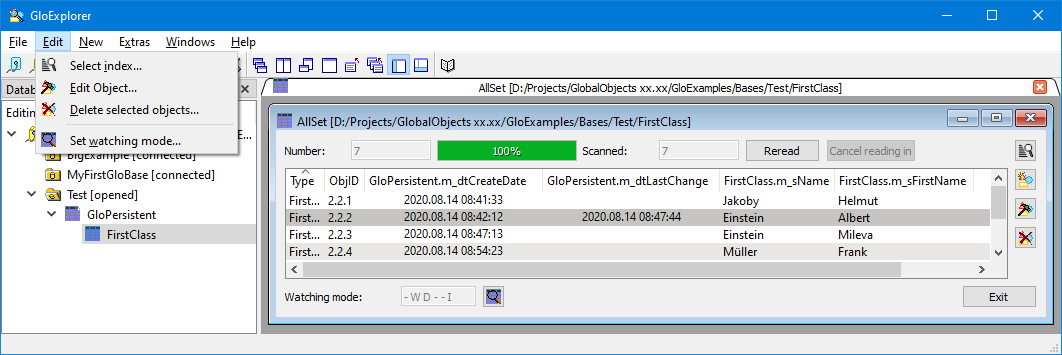
When a Object-AllSet is selected, it is read into a AllSet Window.

If an unopened database is selected, it can be opened. This can fail if, for example, another instance has opened the database as FileBase or the index is damaged.

If an unopened database is selected, it can be reindexed.

If an unopened database is selected, it can be compressed.

If an open database is selected, it can be closed.
If a AllSet has the focus, the Edit menu refers to it.

If the AllSet with the focus has at least one index, the selected index can be used as a filter. See Using AllSet with Index Filter.

The selected object can be edited in AllSet. For this purpose a corresponding Document Window is opened in the Workspace.

The objects selected in the AllSet are deleted after confirmation.

To ensure that the display is updated when other clients make changes, can be set an observation mode.
If an Object Edit Window has the focus, the following items are available in the Edit menu:
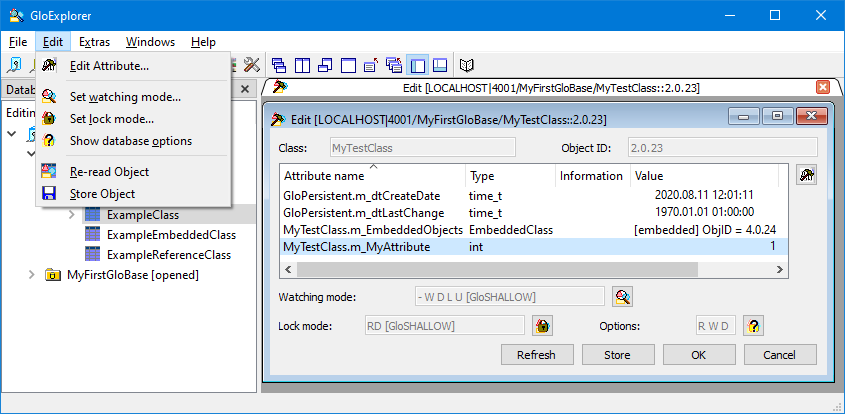

The selected attribute can be edited. To do this, a dialog corresponding to the attribute type is opened.

In order that the values of the object can be updated when other clients make changes, there is the possibility to set an observation mode.

To lock an object for other clients, there is the possibility to set a lock mode.

The own database options are displayed in the Object Editing Window.
See also here.

The object is updated from the database.

The object is stored in the database.
This menu is only active if the Explorer Catalog has the focus.
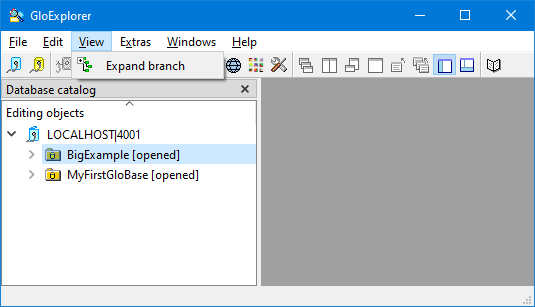


The selected object is recursively 'expanded' in the display with all its sub-objects, if not already done.
Is only available if there is something to open; otherwise it is greyed out.
This menu is only active if a AllSet has the focus.

A new object of the AllSet type can be created and saved using an Edit Window.
This menu is active for all displays.
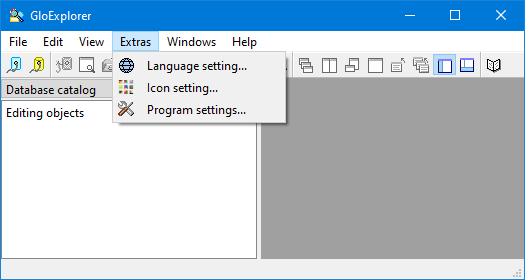

For the GloExplorer the language can be set in a Dialog.

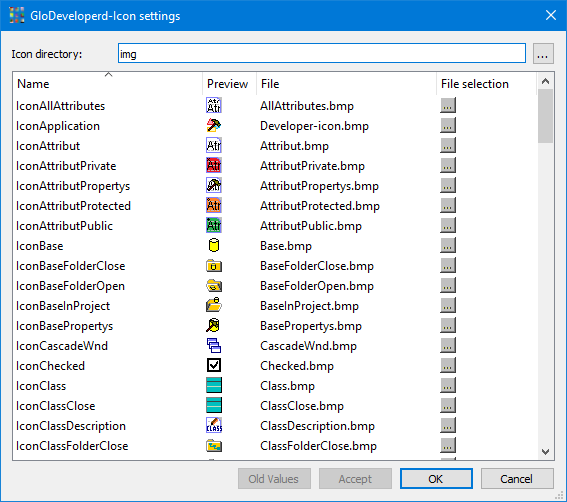
For the GloExplorer the settings for displayed icons can be made in a Dialog.

Basic settings for the GloExplorer can be made in a Dialog.
This menu contains the window manipulating and window display functions.
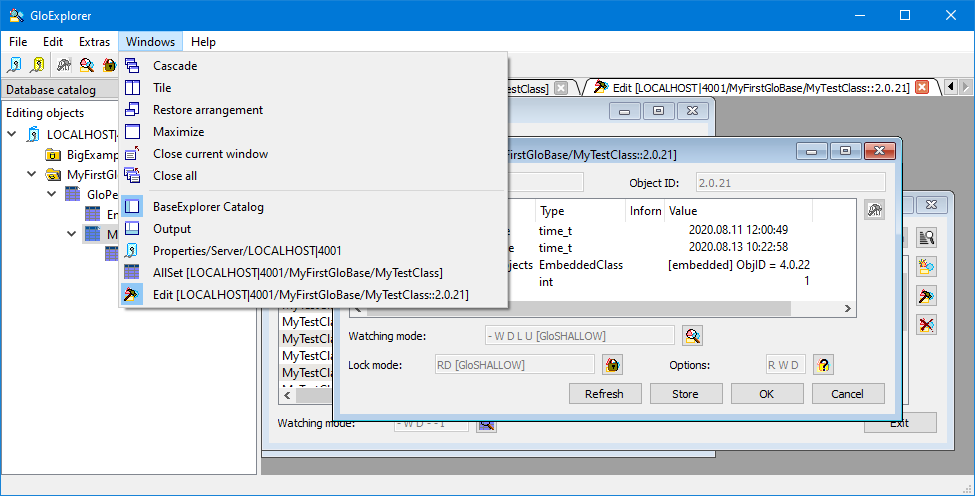
The document windows in the workspace will be arranged overlapping.

The document windows in the workspace will be arranged next to and below each other.
Only has an effect if a document window is maximized. Then the document windows are rearranged in the workspace as they were before maximization.

Only has an effect if the current document window is not yet maximized; it will be maximized and fills the entire workspace.
The current document window in the workspace is closed. If changes have been made to the object in the document window, the user is offered to save them before closing.

All document windows in the workspace are closed. If changes have been made to the objects in the document windows, the user is offered to save them before closing.

The display of the Explorer Catalog can be switched on or off.

The display of the Output can be switched on or off.
The document windows opened in the workspace are displayed as an entry in the Window menu and become the current window by selecting them.
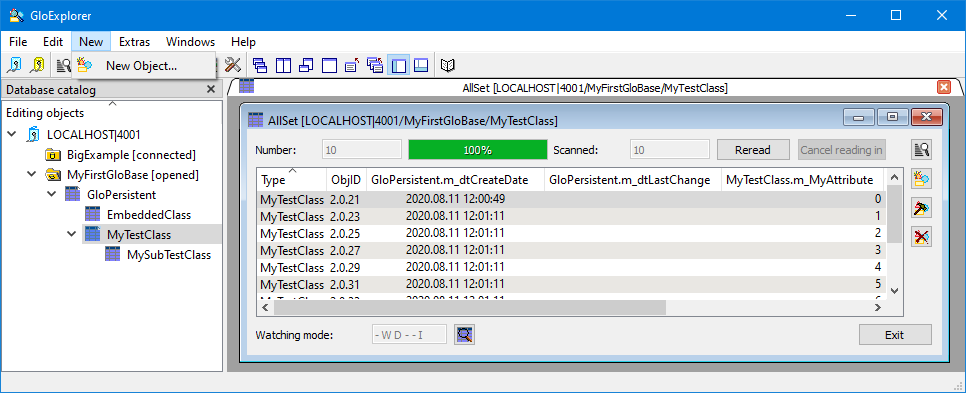
The AllSets and the persistent objects can be edited in parallel in document windows, which are displayed in the workspace.
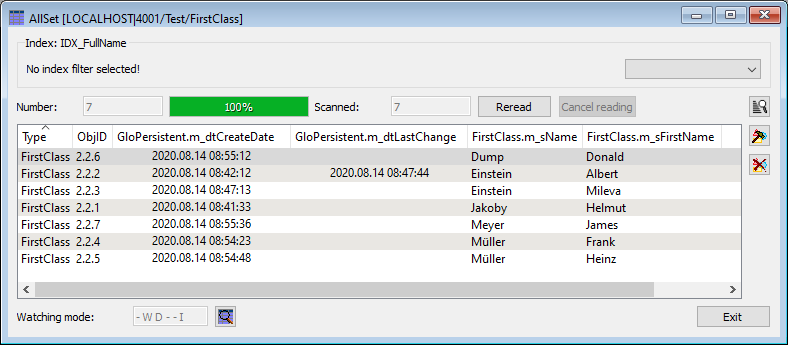
An AllSet (the set of persistent objects of a type) is displayed using Edit / Open selected object.... Objects can be deleted, added and selected for editing.
If at least one index is defined in the database schema for the AllSet class, another button (12.) is displayed. This button can be used to select an index and opens another document window for the AllSet.
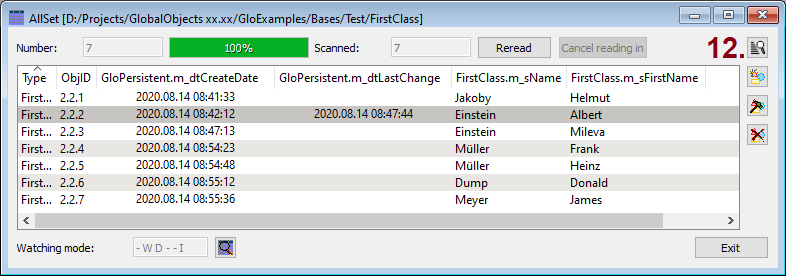
The sorting is now according to the selected index and filters can be set.

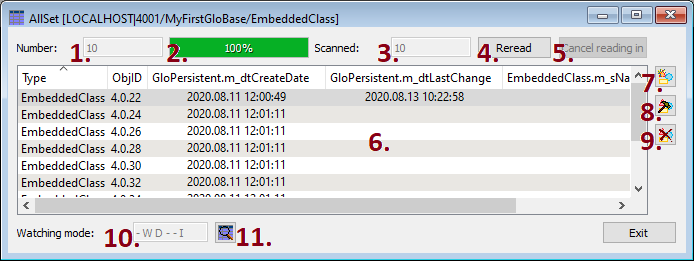
This field shows the number of persistent objects in AllSet.

This field shows the reading progress. If a filter is set, the percentage value shows how many objects correspond to the filter after the complete import.

This field displays the number of objects read from the database.
With this button the reading of objects from the database can be interrupted,

has been resumed,
or canceled.

After the complete import, the import of the objects from the database can be restarted.
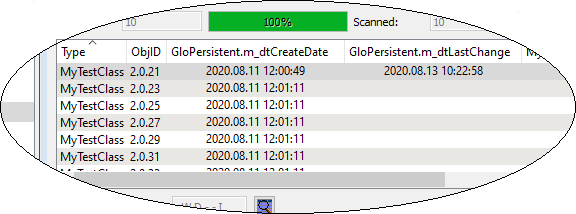
This display shows the persistent objects with their attributes.

A new object of the AllSet type can be created.

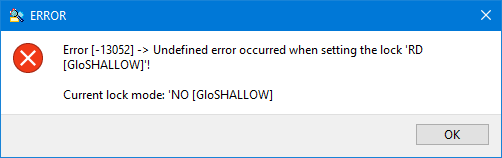
The selected object can be edited. If connected to the GloServer, it is possible that an object to be edited is locked in such a way that it cannot be locked with the preset lock mode; in this case it is displayed with the following dialog

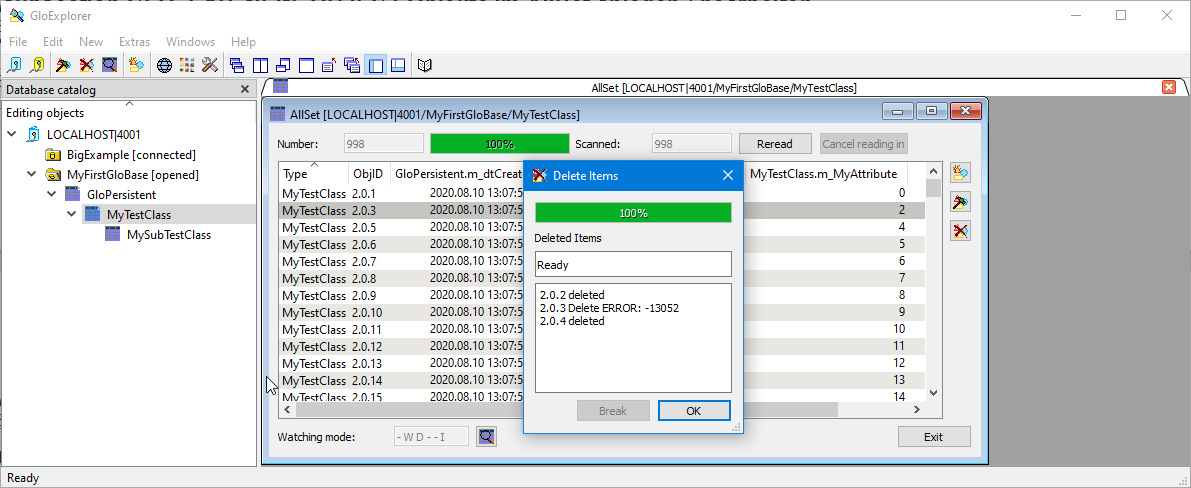
Selected persistent objects can be deleted from AllSet or from the database after a query.
The deleted and, if necessary, because of a lock, not deleted objects are displayed.

Shows the current observation mode for the AllSet.

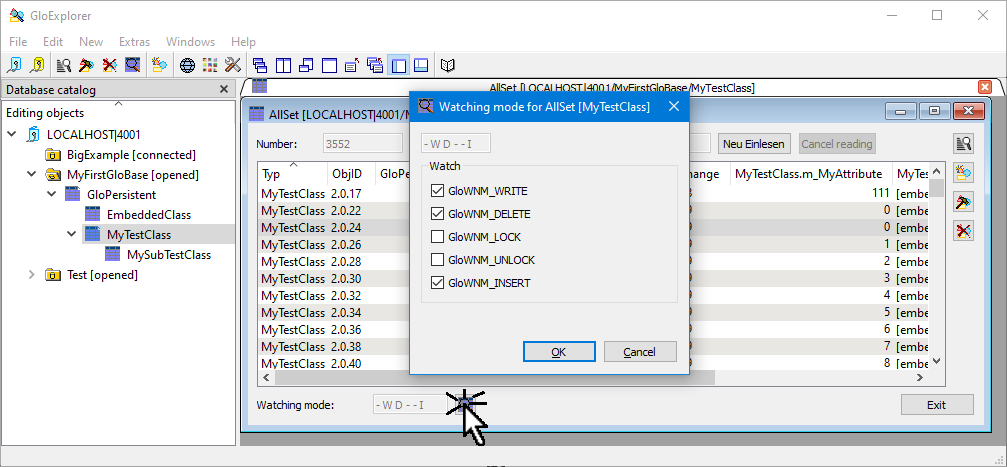
The watching mode for the AllSet can be set via a AllSet Watching Dialog.

An available index from an AllSet can be selected via a AllSet Index Dialog.
If an index is selected from an AllSet document window without already selected index, a new AllSet document window with the option of selecting a filter is opened. When an index is selected from an AllSet document window with already selected index, the index is reset in AllSet. Sorting in the AllSet document window is performed according to the selected index.
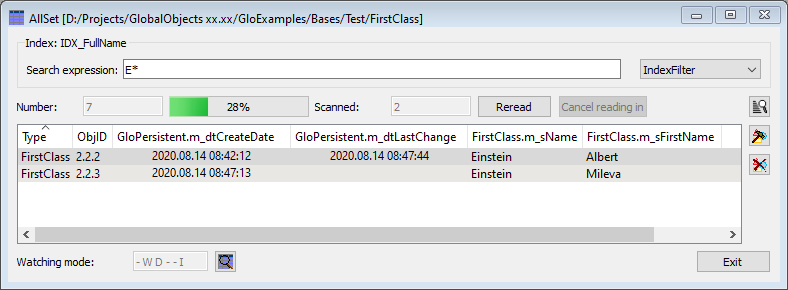
Filter
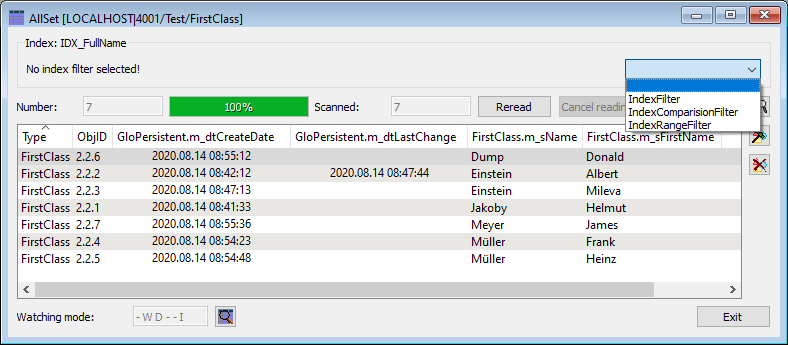
There are three filters available, which can be set individually.
Filter selection " "
If no index filter is selected, all objects are displayed in their index order (unless the import is interrupted).
Filter selection "IndexFilter"
A filter that can contain the placeholders "*" and "?" in the index expression, which are taken into account in the evaluation.
Filter selection "IndexComparisionFilter"

A filter that is defined using "<", "<=", ">", ">=", "==" and "!=". For example, if the search value is "123" and ">=", only all objects with an index greater than or equal to "123" are listed. The index expression may contain the placeholders "*" and "?".
Filter selection "IndexRangeFilter"
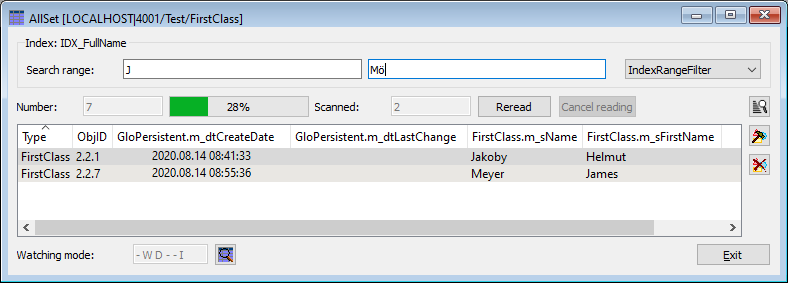
A filter that is defined by means of a range specification. For example, if the first search value is "123" and the second search value is "155", all objects with an index less than or equal to "123" and greater than or equal to "155" will be listed.
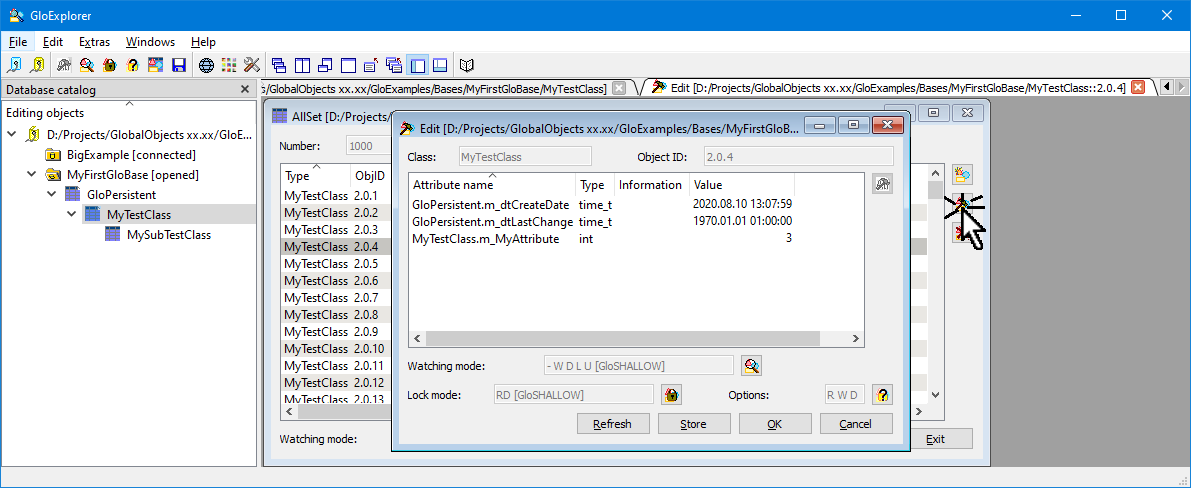
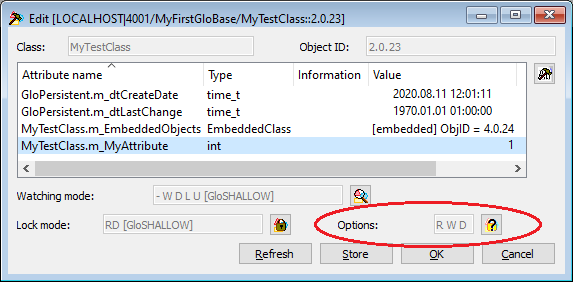
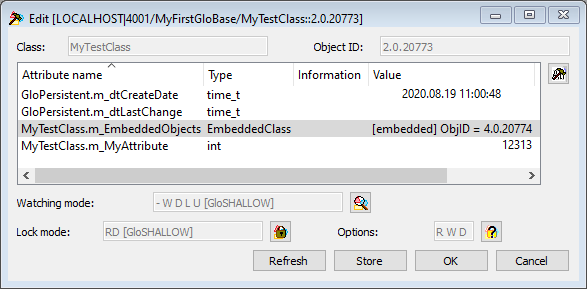
A persistent object or its attributes can be edited using Edit / Edit selected object.... A dialog corresponding to the attribute type will be opened.
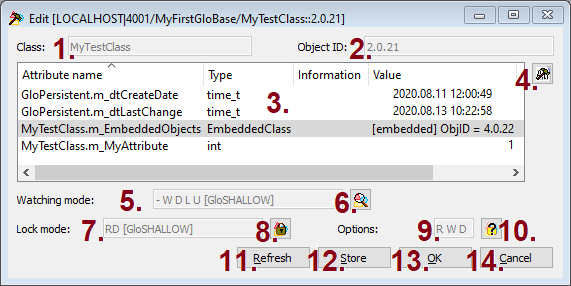
In addition, a lock can be set for the object, and changes can be observed by other clients (when the editing window is called up, the preset observation and lock modes are set).
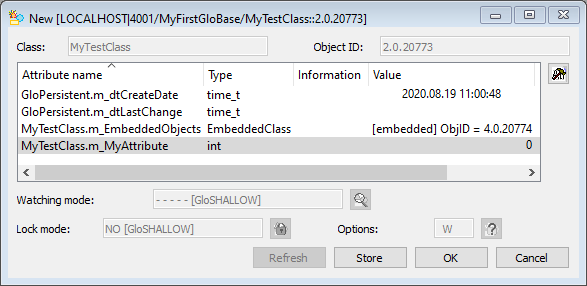
If a new object is to be created, only the attributes can be entered or changed.
If an object already saved is to be edited, the lock and observation mode can be changed in addition to the attributes.

This field displays the class (type) of the object to be edited.

This field displays the unique object ID of the object to be edited.
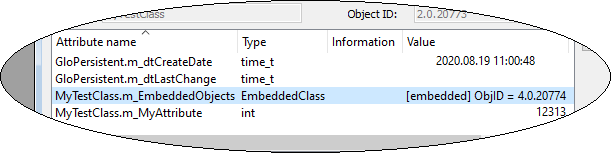
This display shows the attributes of the object.

The selected attribute can be edited. To do this, a dialog corresponding to the attribute type is opened.

Shows the current observation mode of the object being edited.
| Wert | Meaning |
|---|---|
| "R" | Reading is watched. |
| "W" | Writing is watched. |
| "D" | Erasing is watched. |
| "L" | Lock is watched. |
| "U" | Enable is watched. |

The watching mode for the object to be processed can be set via a Object watching dialog.

Displays the current lock mode of the object being edited.

The lock mode for the object to be processed can be set via a Object lock dialog.
The database possibilities of the object to be edited are displayed.
| Wert | Meaning |
|---|---|
| "R" | Object may be read from the database. |
| "W" | Object may be written to the database. |
| "D" | Object may be deleted in the database. |

If the lock or unlock is not watched, the database options can be queried with this button.

The attribute data of the object to be edited are read in again from the database (locally changed data are overwritten).

The attribute data of the object to be edited is written to the database.
If the writing fails, e.g. because of a lock of another client, this is displayed.

The editing window is closed. Changes to the attribute data are saved.
If the writing fails, e.g. because of a lock of another client, this is displayed.

The editing window is closed. If attribute data has been changed, it is asked whether it should be saved.
If the writing fails, e.g. because of a lock of another client, this is displayed.
If connected to a "GloServer", clients connected to it can be displayed.
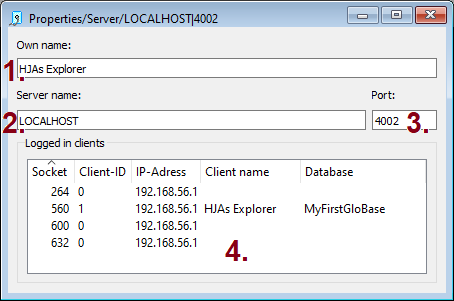
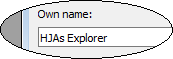
In this field the user name of the GloExplorer is displayed. This can be entered in the Program Settings / Miscellaneous / User.
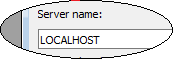
This field shows the name or IP address of the GloServer.
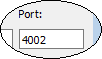
This field shows the port of the GloServer.
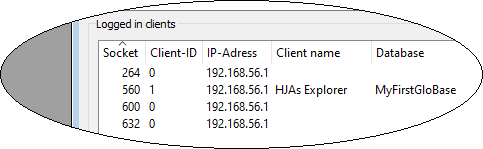
The clients of the GloServer (from the point of view of the GloServer) logged on to a database are displayed.
Fields
The individual dialogues are listed and explained.
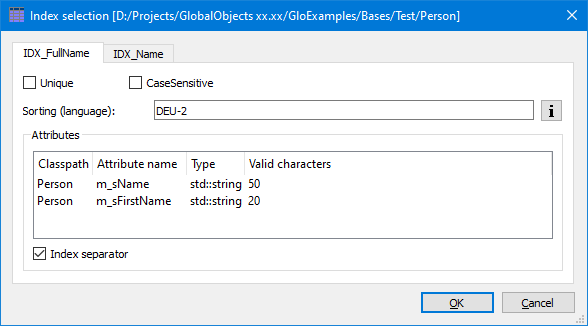
If an index is to be selected in a AllSet, this dialog is displayed:
Each index of the AllSet with its settings is displayed in a selectable tab widget.

The dialog is closed, the selected index is applied and a new corresponding AllSet document window is opened if the call to this dialog was made from an AllSet document window without selected index.
If this dialog was called from an AllSet document window with selected index, the selected index is applied.

No index is taken over.
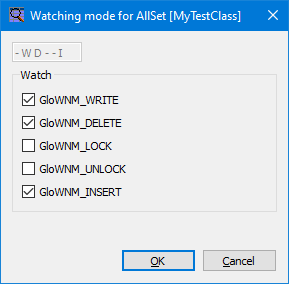
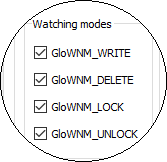
If an AllSet is open, the watching mode can be set via the AllSet watching dialog. The AllSet display is adjusted when changes are made or the entry is briefly highlighted. A notification will also be displayed in the Output, if this is set in the Program Settings / Allset Settings / Watching mode.
If it has been specified in the Program Settings that each time a AllSets is opened the watching mode is to be reset, the AllSet Observation Dialog will look like this before opening:
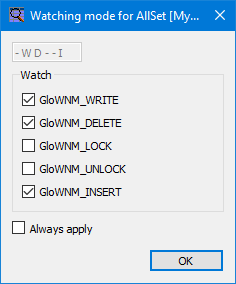
If the checkbox Always apply is set, the current setting will be taken over into the Program Settings and there will be no further request when opening it again.
If objects in an AllSet are to be deleted from the database and it is set in the program settings that the deletion depth must be queried, this dialog is displayed.
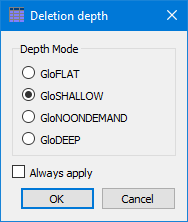
If the checkbox Always apply is set, the current setting will be applied to the program settings and there will be no more prompts when deleting from the database next time.
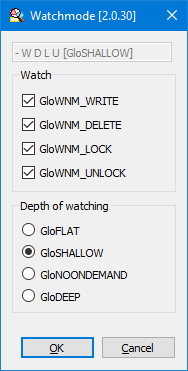
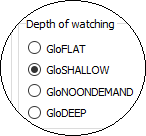
When an object is displayed in an object editing window, the watching mode and the watching depth can be set via the object watching dialog.
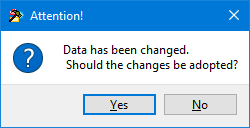
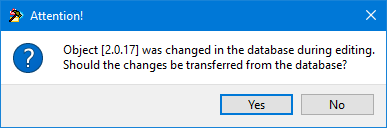
If the watching mode glo::WNM_WRITE is set, and if the object is saved in the database by another instance when it is edited, a dialog is displayed which offers the choice of whether the changes should be applied to the dialog respectively to the referenced persistent object.
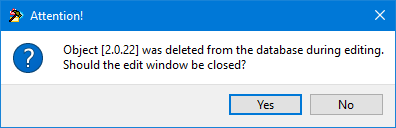
If the watching mode is set to glo::WNM_DELETE and the lock mode is set to glo::LK_NONE, and if the object is deleted from the database by another instance while it is being edited, a dialog is displayed which allows you to choose whether to close the editing window. The object can no longer be saved.
If it has been specified in the Program Settings / Object Settings that the user should be prompted for the watching mode each time an object editing window is opened, the object observation dialog will look like this before opening:
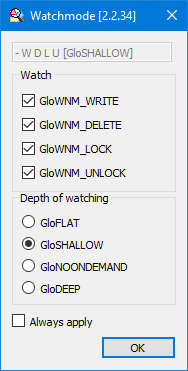
If the Always apply checkbox is selected, the current setting is applied to the program settings and no further prompts are displayed the next time the program is opened.
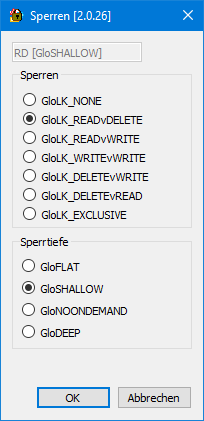
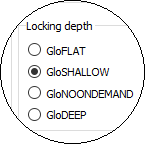
When an object is displayed in an object editing window, the lock mode and the lock depth can be set via the object lock dialog.
If it has been specified in the Program Settings / Object Settings that the lock mode and lock depth should be requested from the user each time an object editing window is opened, the object lock dialog will look like this before opening:
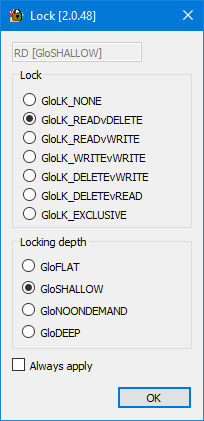
If the Always apply checkbox is set, the current setting is applied to the Program Settings and there is no need to enter it the next time the program is opened.
If in an object editing window the object is to be saved and in the Program Settings / Object Settings is set that the storage depth must be requested, this dialog is displayed.
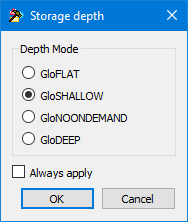
If the Always apply checkbox is set, the current setting is applied to the Program Settings and there will be no further prompting the next time an object is saved.
The attributes are edited in dialogs corresponding to the attribute type. All dialogs have at least the three buttons:

The original value of the attribute is displayed again.
The dialog is closed and any changed value is accepted.
The dialog is closed, any changed value is not accepted.
A dialog to edit an attribute of type eut::Blob. Editing means that a file can be loaded into the blob or the blob can be saved as a file.
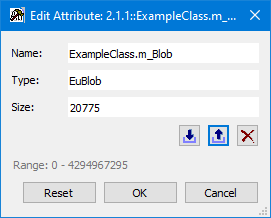
Read blob from file

A file import dialog is opened. A file can be read into the blob.
Save blob as file

A file save dialog is opened. The blob can be saved to a file.
Delete blob

Deletes the blob from the attribute.
A dialog to edit an attribute of type bool.
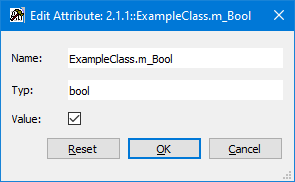
Set value

With the checkbox Value: the Boolean value can be set; a 'check' mark means 'true'.
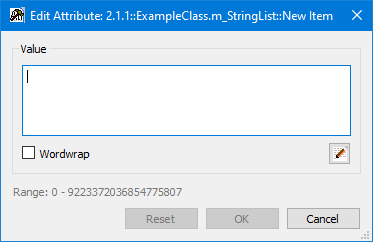
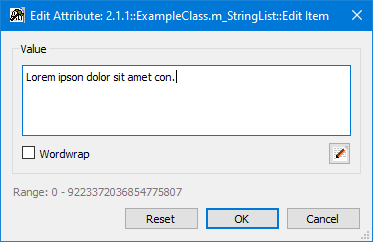
A dialog to edit an attribute of type std::string.
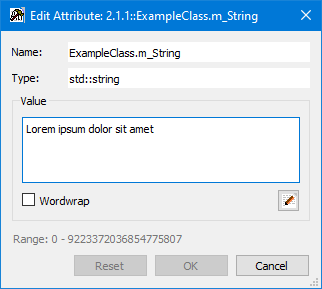
Wordwrap

The text in the input field can be wrapped for better readability. Wrapping is only done in the display.
External text editor

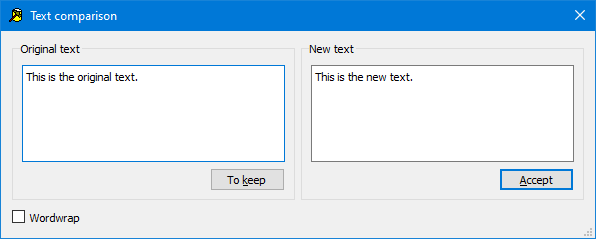
The text can also be edited in an external text editor. The prerequisite is that an external text editor is entered in the Program Settings / Miscellaneous / External Text Editor. After editing, the original description can be compared with the new text (if there are changes) and the text to be transferred can be selected.
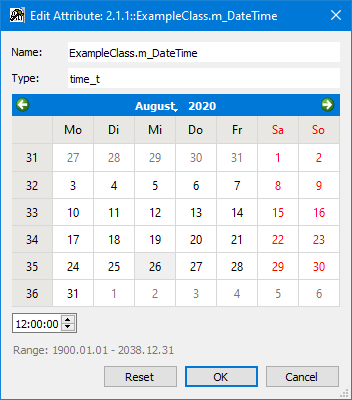
A dialog to edit an attribute of type time_t.
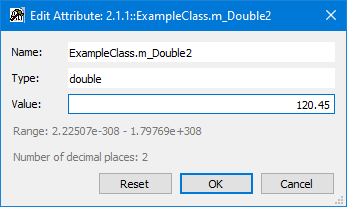
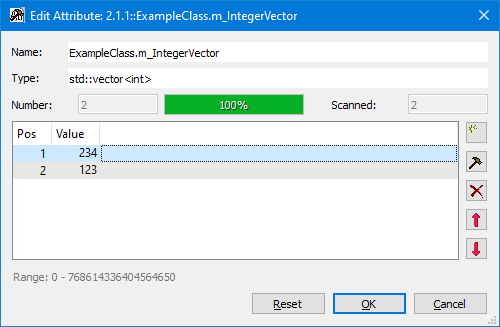
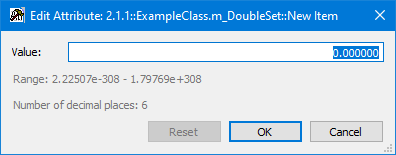
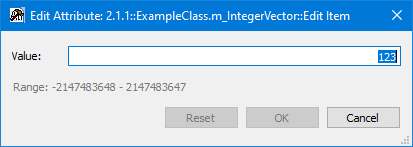
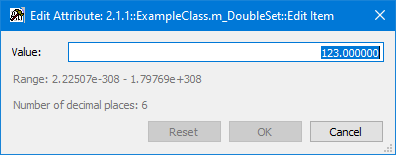
Dialogs to edit an attribute of the type char, integer, unsigned integer, short, unsigned short, long, unsigned long, long long, unsigned long long, float, double and long double.
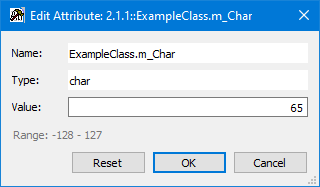

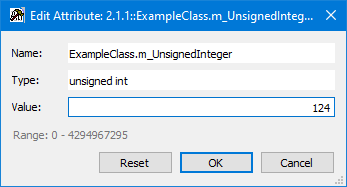
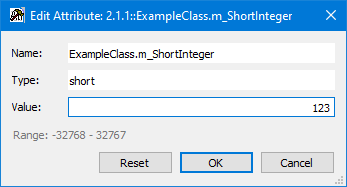
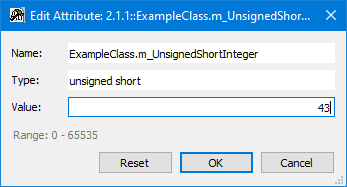
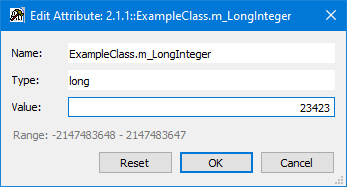
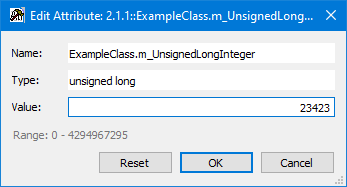
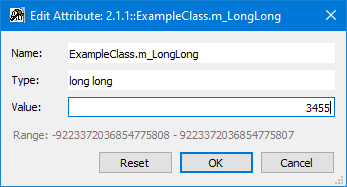
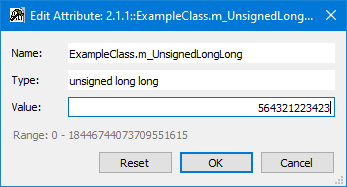
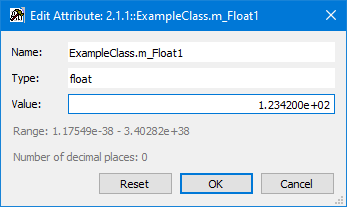
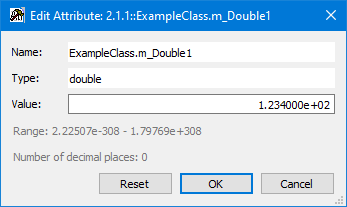

If no decimal places are defined for the types float, double and long double, the value is displayed in Scientific notation. The value can be entered in this notation or simply with decimal places.
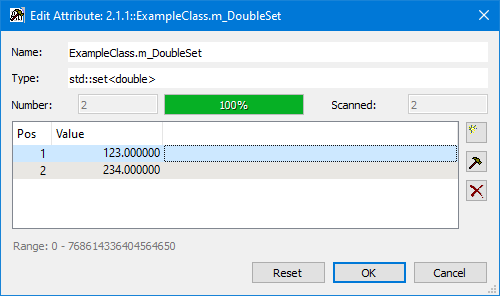
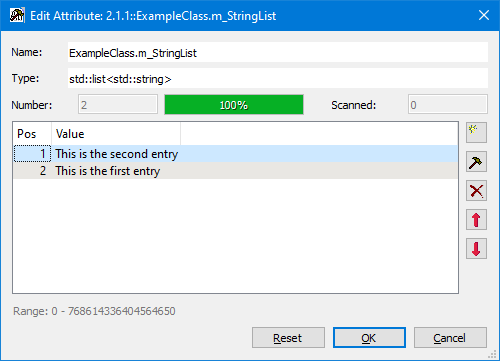
A dialog to edit an attribute of type
Example for std::vector<int>
Example for std::set<double>
Example for std::list<std::string>
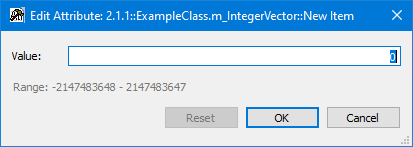
New Entry

A new entry can be added to the respective container for integer via…
…or for double via…
…or for std::string via…
The new entry is inserted before a selected entry. Otherwise it is appended as the last entry.
Edit entry

The selected entry can be changed for integer via…
…for double via…
…or for character std::string via…
In the editing window for strings,…
…and…
are also available; a description can be found here.
Remove entry

The selected entry is removed from the container after a confirmation prompt.
move entry


The last selected entry is moved one place up or down in the order.
A dialog to edit an attribute of type glo::ObjID. This makes it possible, among other things, to reference objects from another database. The individual values of the object ID can be entered directly into the fields.

Select referenced object

An object ID can be selected from an "AllSet selection dialog" of glo::Persistent (the same database).
Edit referenced object

If a valid object ID is displayed, this object can be edited via an "Object Edit Window".
Remove referenced object

The displayed object ID is set to NULL (0.0.0).
A dialog to edit an attribute of type any glo::Persistent. The individual values of the object ID can be entered directly into the fields.
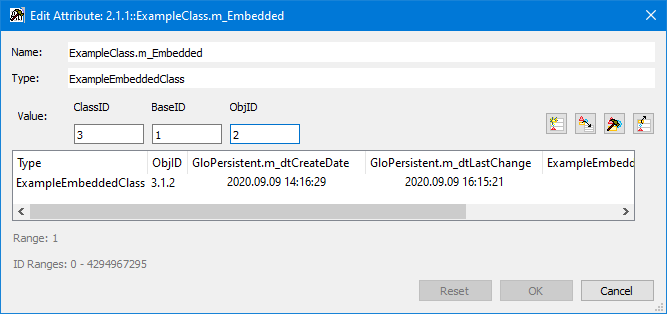
Read referenced object new

If an object ID and the object itself are displayed, it can be read in again.
Select referenced object
An object ID can be selected from an AllSet selection dialog of the embedded object type (without subclasses).
Edit referenced object
If a valid object ID is displayed, this object can be edited via an Object Edit Window.
Remove referenced object
The displayed object ID is set to NULL (0.0.0) and the referenced object is removed from the display.
A dialog to edit an attribute of type any glo::Persistent. The individual values of the object ID can be entered directly into the fields.
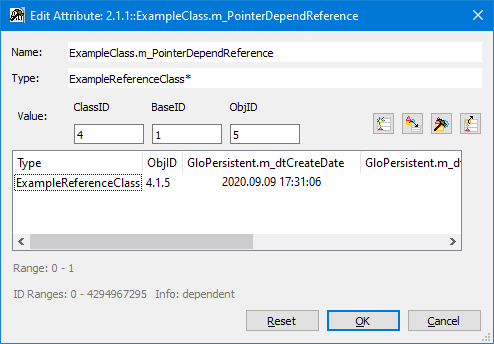
Read referenced object new
If an object ID and the object itself are displayed, it can be read in again.
Select referenced object
An object ID can be selected from an AllSet selection dialog of the embedded object type (without subclasses).
Edit referenced object
If a valid object ID is displayed, this object can be edited via an Object Edit Window.
Remove referenced object
The displayed object ID is set to NULL (0.0.0) and the referenced object is removed from the display.
A dialog to edit an attribute of type std::shared_ptr<any glo::Persistent>. The individual values of the object ID can be entered directly into the fields.
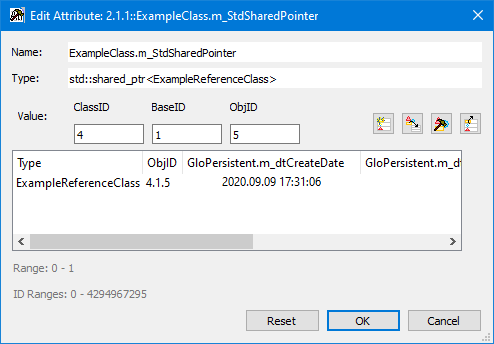
Read referenced object new
If an object ID and the object itself are displayed, it can be read in again.
Select referenced object
An object ID can be selected from an AllSet selection dialog of the embedded object type (without subclasses).
Edit referenced object
If a valid object ID is displayed, this object can be edited via an Object Edit Window.
Remove referenced object
The displayed object ID is set to NULL (0.0.0) and the referenced object is removed from the display.
A dialog to edit an attribute of type glo::TOndemand<any glo::Persistent>. The individual values of the object ID can be entered directly into the fields.

Read referenced object new
If an object ID and the object itself are displayed, it can be read in again.
Select referenced object
An object ID can be selected from an AllSet selection dialog of the embedded object type (without subclasses).
Edit referenced object
If a valid object ID is displayed, this object can be edited via an Object Edit Window.
Remove referenced object
The displayed object ID is set to NULL (0.0.0) and the referenced object is removed from the display.
A dialog to edit an attribute of type glo::TOndemandSet<any glo::Persistent> or glo::TOndemandList<any glo::Persistent>.
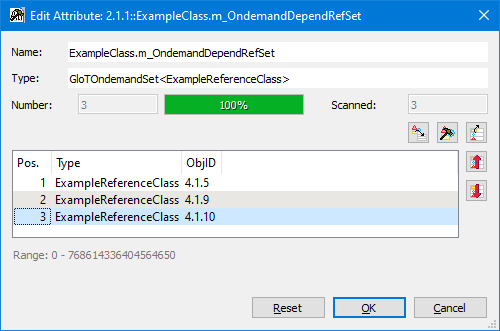
Select referenced object
An additional object ID can be selected from an AllSet selection dialog of the type of the referenced object (including subclasses).
Edit referenced object
If valid object IDs are displayed in the list, the selected object can be edited via an Object Edit Window.
Remove referenced object
The selected object IDs are removed from the list.
Move entry


The order of the object IDs can be changed by moving the selected object ID. This can also be done with the [+] and [-] keys.
A dialog to edit an attribute of type glo::TPointerSet<any glo::Persistent> or glo::TPointerList<any glo::Persistent>.
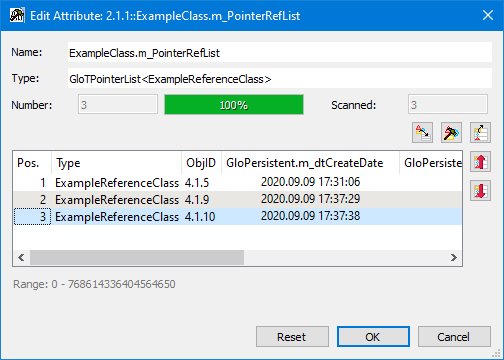
Select referenced object
An additional object ID can be selected from an AllSet selection dialog of the type of the referenced object (including subclasses).
Edit referenced object
If valid object IDs are displayed in the list, the selected object can be edited via an Object Edit Window.
Remove referenced object
The selected object IDs are removed from the list.
Move entry
The order of the object IDs can be changed by moving the selected object ID. This can also be done with the [+] and [-] keys.
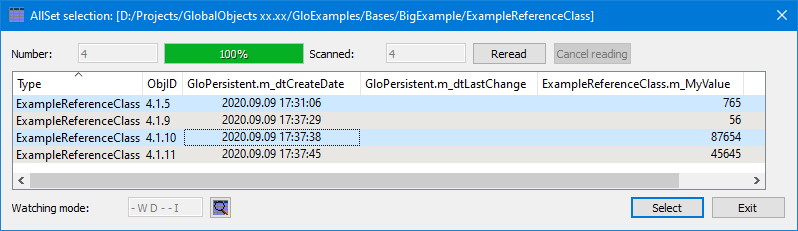
A selection dialog for selecting objects from an AllSet. Depending on the capabilities of the calling instance, the objects of the AllSet's class are displayed with or without subclasses and can be selected several times if necessary. The choice is made by selecting the specified objects.
Watching AllSet
Shows the current watching mode for the AllSet selection dialog
The Watching Mode for the AllSet selection dialog can be set via an AllSet Watching Dialog. See also glo::TdWatchNotifyMode.
Select object

The selected objects are taken over (also triggered by [Enter]). Double-clicking on an element selects only the clicked element. The dialog is always closed.
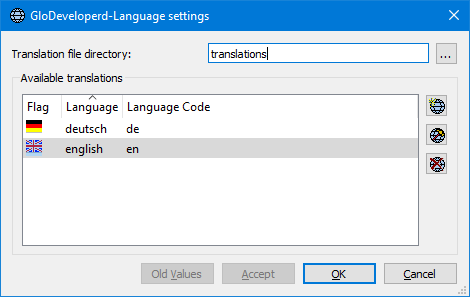
The GloExplorer can be set to a different language.
The icons used in GloExplorer can be changed in detail by referring to an image file (BMP or PNG).
It can also change the icon directory to replace all icons at once.
The GloExplorer has some settings, which the user can adjust to his taste. Persistent objects in an AllSet
These settings apply when working with the "AllSet editing window".
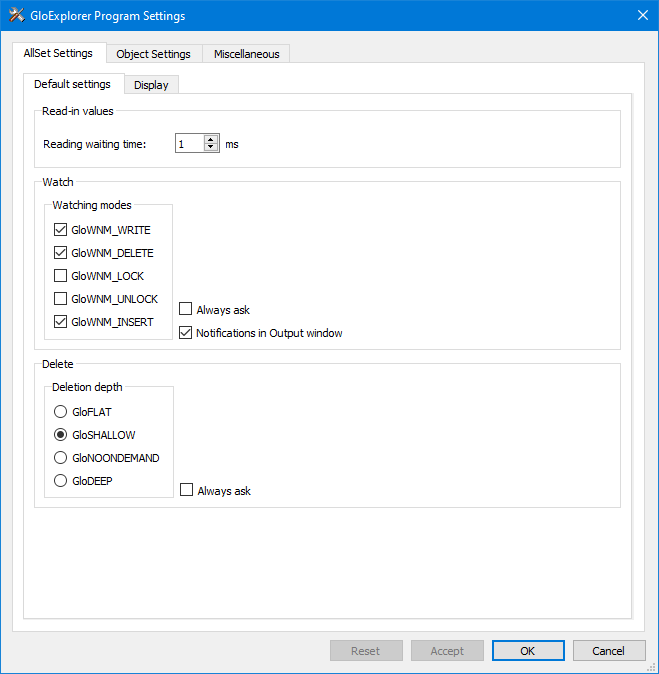

To give the display thread enough time to display an object read in in the AllSet display, you can set a time of 0 - 10 ms here, which waits until the next object is read in.
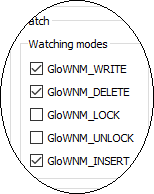
The default Watching Mode can be set for AllSets.

If the checkbox Always ask is set, when an AllSets is opened the Watching Mode is always requested via an AllSet Watching Dialog.

If the checkbox Notifications in Output Window is set, AllSet notifications are also displayed in the Output.
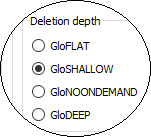
It can be also set the default Deletion depth of an object.
If the checkbox Always ask is set, the Deletion depth is always requested via an einen AllSet delete depth dialog before an object is deleted.
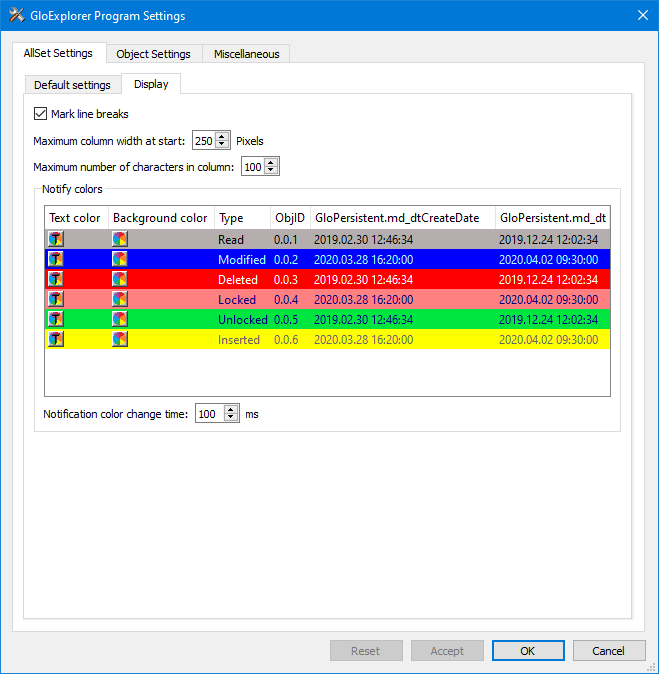
This is where you make settings for the AllSet display.
>br>
By setting the checkbox Mark line break, every second line in the AllSet display is highlighted in color.
>br>

You can set the Maximum column width at start in pixels.

With Number of characters in column long strings can be shortened for display.
Notify colors When objects of an AllSet are watched by it and AllSet notifications are processed, the affected entries are briefly color-coded.

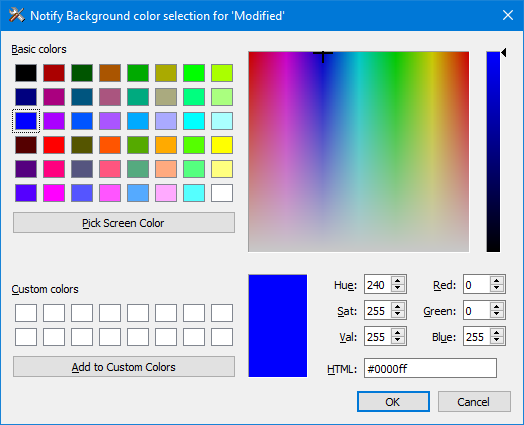
The text and background color can be set by clicking the buttons via a color selection dialog.
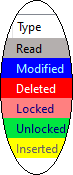
The respective Watching Mode can be seen in the column Type.

How long the color marking should be displayed can be set here.

This is where settings for editing an object in the Object Edit Window are made.

You can set the Maximum column width at Start in pixels.
The default watching mode can be set for the Object Editing Window.
In addition, the preset watching depth of an object can be set.
If the checkbox Always ask is set, the watching mode is always asked for via an Object Watching Dialog when opening an Object Editing Window.

The preset Lock Mode can be set for the Object Edit Window.
It can be also set the default locking depth of an object.
If the checkbox Always ask is set, the der watching mode is always requested via an Object Lock Dialog when opening an Object Edit Window.

You can set the default Storage depth for the Object Editing Window.
If the checkbox Always ask is set, when saving an object in the Object Edit Window, the Stor Depth Mode is always requested via an Object Save Depth Dialog.
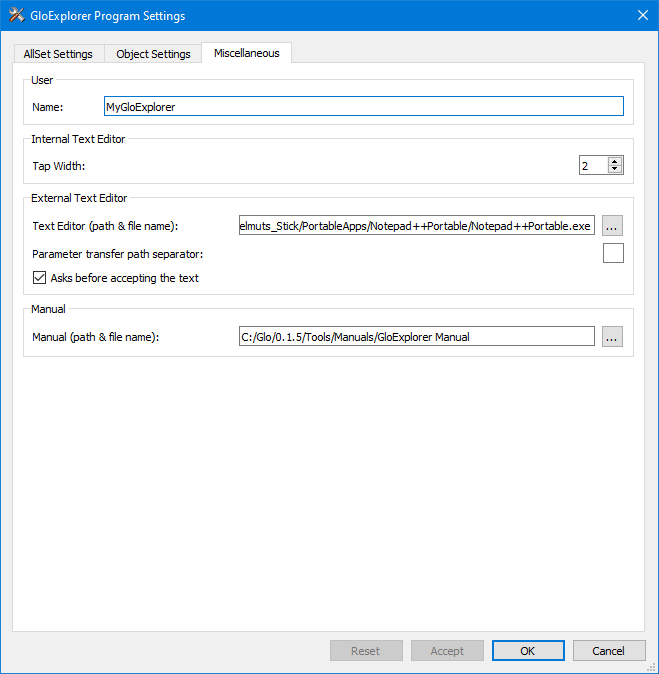
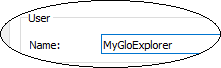
The user name can be entered here. This is displayed in the GloExplorer in the Server Properties Window in the column 'Client Name' when a database is open.
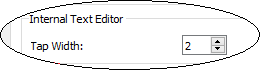
The tabulator step size for editing strings and texts in the respective attribute dialogs can be set here.
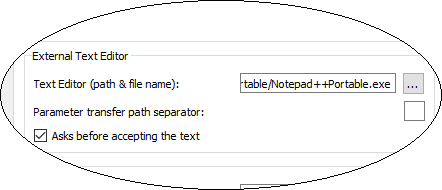
An external editor can be set up for editing strings and texts in the respective attribute dialogs. Since some editors are a bit strict with the type of path separator (times '/' or '\'), this can also be specified.
In addition, it can be specify whether changed texts are only accepted after a query.

Here the manual of the GloExplorer can be referenced. This is usually done by the GlobalObjects-Setup program.

